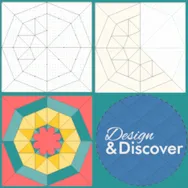
As far as pieced blocks go, you can draw any block with EasyDraw. Sometimes though, it is easier to draw certain types of blocks in PolyDraw, particularly those that can be aided by using one of the grids. PolyDraw has automatic snapping based on the grid on which you are working. The PolyDraw tools are your only sources for drawing this type of block. With the PolyDraw tools, you’ll notice that with each click, your line will snap to the closest grid point or arc. Click here to learn more about the PolyDraw tools. You may also notice two layer tabs at the bottom of the drawing board: PolyDraw and Applique. The PolyDraw tab is for drawing pieced blocks using the PolyDraw tools, and therefore the patches cannot overlap. The Applique tab is for adding applique patches on top of your piecing. You do not need to do anything on this tab
Favorite Posts
Design & Discover – EasyDraw vs. PolyDraw
Posted 05-01-2021 by Heidi | Posted in: Design & Discover
Design & Discover – Drawing a Pieced & Applique Block
Posted 04-01-2021 by Heidi | Posted in: Design & Discover
If you would like to draw a combination, or overlaid, block with a pieced bottom layer and an applique layer on top, you have two choices. The difference is the drawing tools that are used for the pieced layer. EasyDraw + Applique lets you use the EasyDraw tools on the pieced layer, and the Applique tools on the applique layer. PolyDraw + Applique lets you use the PolyDraw tools on the pieced layer, and the Applique tools on the applique layer. First we’ll try EasyDraw + Applique. Click Block Worktable Click NEW BLOCK Click Pieced & Applique Click Easy + Applique Make your block 6 x 6 Use the Grid tool to make a 6 x 6 grid Click the Applique tab at the bottom of the screen. Click the Shape tool and use the PoiseMaker to create some flower shapes. Use the other Shape tools to draw flower centers, stems
EQ8 Lessons with Yvonne – Using SVG Files from BlockBase+
Posted 03-21-2021 by Yvonne | Posted in: BlockBase+ EQ8 EQ8 Lessons with Yvonne Favorite Posts
The newest software release from Electric Quilt is here! Block Base+ is the newest software that is a companion to the Block Base book. Some of you may have the original Block Base CD that was released several years ago, but the new updated Block Base+ is fantastic. It is so versatile with all the things you can do with it. The greatest new feature for the Block Base + program is that you can select a block and set the size you want and then export it as a .svg file. This is very exciting because of all the cutting machines on the market today. You can send your .svg file to your cutting machine and cut all the pieces needed for your block construction. This saves a lot of time. We can not save an image as a .svg file in EQ8, so having the ability to do
Design & Discover – Creating a Design from an Image
Posted 03-01-2021 by Heidi | Posted in: Design & Discover
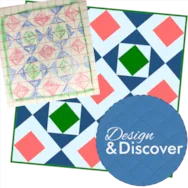
What if you have an image of a quilt you’d like to design in EQ8? Here are some tips for recreating quilts in EQ8. There are two main parts….figuring out the blocks and figuring out the layout. First, look at the quilt and see if you notice any blocks that you know by name. If so, find them in the EQ8 Block Library by searching by notecard by name. You can also try searching By Category with information you know about the block…For example for this block you could choose Pieced and Other Stars. Another option is to browse likely Block Library categories to see if you can find the block you are looking for. Even if you find something similar, you can edit the block. If you can’t find the block you can draw it. In this example you could also just use half square triangles. Just rotate and recolor. Or, try to analyze the quilt and see if you can break
Design & Discover – Quilts with Triangles!
Posted 02-01-2021 by Heidi | Posted in: Design & Discover
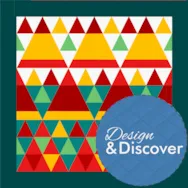
There are a few different ways to make quilts with triangles in EQ8. The simplest way is using a One Patch Quilt layout. Click Design a Quilt from Scratch. Click One Patch Click the LAYOUT tab Click the down arrow under Patch Style to select Lightning You can change the number of units and the finished size of the units. Here is more information on One Patch quilts and how the patches are counted. Click the DESIGN tab. Click Fabric Tools. Please Note: Blocks cannot be placed in One Patch Quilt layouts. See Step 29 for how to add triangles to Layer 2 of any quilt layout. Click Paintbrush. Add colors and fabrics as you wish. Click Add to Project Sketchbook . If you haven’t named your project yet, EQ8 will prompt you to do so. (To be saved, your item needs to be in the Sketchbook AND your project needs to be
EQ8 Lessons with Yvonne-Treat Yourself
Posted 01-17-2021 by Yvonne | Posted in: EQ8 EQ8 Lessons with Yvonne Favorite Posts
2020 was a challenging year. Start 2021 by treating yourself. I turn to my sewing room for inspiration and it provides me with a calming retreat area in my own home. It starts with my favorite inspiration tool–EQ8. Browsing the huge built-in libraries for blocks and layouts gives me just the right space to start experimenting with new design ideas I had not tried before. I like to start my process by looking through the block library in EQ8. I also have many add-on libraries that the EQ company has provided us with to add to the already massive library of blocks in the program. I simply scroll through the library and look at the blocks and choose one that I have not tried before. Open your EQ8 program and start a new project called ‘Treat Yourself in 2021′. I can look at the blocks by category or by construction method.
Design & Discover – The Serendipity Tool
Posted 01-01-2021 by Heidi | Posted in: Design & Discover
The Serendipity tools allow you to magically turn any block into a new original block. It can be lots of fun to play around and experiment but, also very useful. There are seven different Serendipity options that we will try in this month’s Design & Discover. Click Block Worktable Click Create Serendipity You can use the default blocks but if you would like more options click Open Library and add some more to your sketchbook. Click Frame Block Choose a block on the right Choose a frame on the left. There are over 140 to choose from. Click Add to Sketchbook when you have a block you like. Once you click Add to Sketchbook the block you created will go to the bottom of the block column on the right. Click on the new block and add another frame. Click Add to Sketchbook Click Close when you are done experimenting.


