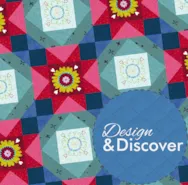
This month we are exploring the possibilities with the Baby Block layout in EQ8! Follow along with the lesson and create a quilt to submit right on our blog. If you have a blog, make sure to add your site too. Let’s visit each others’ blogs and all get to know each other! Let’s get started! When you come across the Baby Block layout you may just imagine that you can use that for making Tumbling Blocks style quilts. Which, of course you can! But, you can do a lot more too! Click NEW QUILT > LAYOUT > Baby Blocks Make your quilt 6 x 6 with a finished size of 9 inches. To color the quilt click the DESIGN tab > Fabric Tools > Paintbrush and color the quilt as you desire. With the same layout, just colored differently, you can have 6 pointed stars! But, you can also
Favorite Posts
Design & Discover – Baby Block Quilts
Posted 04-01-2019 by Heidi | Posted in: Design & Discover
LESSONS WITH YVONNE–SPRING FLOWER STENCILS
Posted 03-17-2019 by Yvonne | Posted in: EQ8 EQ8 Lessons with Yvonne Favorite Posts
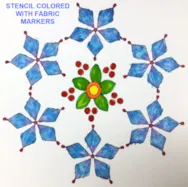
Spring is coming up fast. It makes me think of new beginnings with new fresh flowers and the leaves budding on the trees. This inspires me to start a new quilt celebrating the flowers sprouting up from the cold winter ground. Open your EQ8 program and click on the ‘design a block from scratch’ heading on the opening page. On the block worktable, click on the new block tab>applique>motif. On the block properties bar at the top of the worktable, set the block size to 8 x 8 inches. In the drawing tools box at the left click on the shapes icon and then click on the stencil maker icon. In the dialogue box, use the slider bars to change the shape of the elements to create a flower like design then click OK to place it onto the worktable. Once the design is on the worktable and still selected,
Design & Discover – Using all 3 Layers on the Quilt
Posted 03-01-2019 by Heidi | Posted in: Design & Discover
Do you know the differences between all the layers on a quilt layout? Follow along with the lesson and create a quilt to submit right on our blog. If you have a blog, make sure to add your site too. Let’s visit each others’ blogs and all get to know each other! Let’s get started! Here is a brief summary of the layers in EQ8… Layer 1 Made up of pieced or applique blocks sewn together to make the quilt top. Blocks are set onto the quilt by clicking into a predefined block space. (Unless you are using a Custom Set Layout. See more about that here.) Layer 2 For blocks, motifs and text that are sewn onto the quilt top. Blocks and motifs are set by dragging from the palette and dropping them onto the quilt. The Adjust tool is used to move, resize, rotate and skew these designs
Design & Discover – Coloring and Recoloring
Posted 02-01-2019 by Heidi | Posted in: Design & Discover
Even if you think you know how to color your quilts, you will probably learn something new from this lesson! You can follow along and submit your version of the quilt right on the blog with a link up. If you have a blog, make sure to add your site too. Let’s visit each others’ blogs and all get to know each other! (Before getting started, keep in mind any of the images can be viewed larger by clicking on them.) We are going to start with a very basic quilt. Click NEW QUILT > Horizontal Click the LAYOUT tab. For this lesson it doesn’t really matter what your layout is, but you can see what I have below. Click the DESIGN tab > Block Tools > Set Block Use Alt+click/Option+click to set the blocks shown in alternating positions. (These are both default blocks and don’t need to be added
LESSONS WITH YVONNE–QUILT TOO INTRICATE TO PIECE TOGETHER?
Posted 01-20-2019 by Yvonne | Posted in: EQ8 EQ8 Lessons with Yvonne Favorite Posts
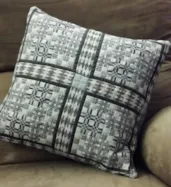
I was at an EQ8 class not too long ago and we were all making quilt layouts. I was laughed at because my layout was so intricate that one observer said “You would never make that!”. It had so many details to the piecing pattern in multiple sizes that it would indeed have been a challenge. I often play with my EQ8 program to see what I can create. But, I may not necessarily have the time to make it in fabrics. No problem! EQ8 lets me still be creative and use the most intricate of patterns I can think up. I find designs very interesting if they are one block only made in multiple sizes and all sewn together. This can be accomplished easily using the custom set quilt layout options in the EQ8 program. Open your EQ8 program. On the opening page, click on the work on quilt
Design and Discover – Designing with Block Photos
Posted 01-01-2019 by Heidi | Posted in: Design & Discover
Do you have blocks that you’ve already sewn but aren’t sure what to do with? Did you know you can import photos or scans of the blocks into EQ and play with them to help you decide what to do? Follow along with the lesson and submit your version of the quilt right on the blog with a link up. If you have a blog, make sure to add your site too. Let’s visit each others’ blogs and all get to know each other! (Before getting started, keep in mind any of the images can be viewed larger by clicking on them.) The first step is to get images of all the blocks. If you are scanning your blocks try to use 72 or 75 dpi. If you are taking photos of your blocks try to make sure the blocks are laying flat, so there are no shadows on the
Design & Discover – Pointed Table Runner
Posted 12-01-2018 by Heidi | Posted in: Design & Discover
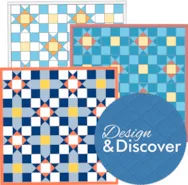
Welcome to Design & Discover! You can follow along with a lesson and submit your version of the quilt right on the blog with a link up. If you have a blog, make sure to add your site too. Let’s visit each others’ blogs and all get to know each other! Before getting started, keep in mind any of the images can be viewed larger by clicking on them. Also, you don’t have to make the quilts exactly as shown, have fun and make it your own! You don’t have to make all the quilts, feel free to just make the one(s) you are interested in! This month we will be making table runners with pointed ends! For our first quilt click Quilt Worktable > NEW QUILT tab > On-Point. Click the LAYOUT tab. Choose the option on the right for Style. For Number of Blocks enter 3 Horizontal and


