Welcome to DESIGN AND SEW ALONG 3- LESSON THREE Lessons with Yvonne. I hope you have enjoyed the first two lessons of this series. In this lesson, we will explore the winter months and the holidays of New Year, and Valentine’s Day. Each set of lessons explores some different tools to use to create the 16-inch blocks we determined to be the size of all the blocks in our continuing lessons. Parts of this lesson three will be challenging. So, if you found the first two lessons a little simple for you, hold on tight as this gets more challenging! Remember to watch the video at the end of the blog to start with to familiarize yourself with the steps we will be taking during these classes written lessons. A picture is worth a thousand words and visual learning is helpful for any of the classes. Remember to save an
Favorite Posts
Design and Sew Along 3 – Lesson Three
Posted 09-20-2020 by Yvonne | Posted in: Design and Sew Along EQ8 Lessons with Yvonne Favorite Posts Lesson 3
Lessons with Yvonne – Back to School
Posted 09-20-2020 by Yvonne | Posted in: EQ8 EQ8 Lessons with Yvonne Favorite Posts
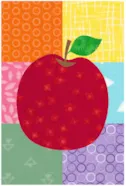
Let’s celebrate going back to school! A great way to start a new school year is to make a little gift for the teacher. EQ8 can help us design a very simple little ‘mug rug/coaster’ for the teacher. Open your EQ8 and name a new project called ‘back to school’. Click on the block worktable icon on the upper right side of the screen. Click on New Block>Pieced and Applique>Easy Draw. At the top of the block worktable, set the dimensions to be 4 x 6 inches with 24 snaps horizontal and vertical. On the left side of the screen, click on the grid tool to select it. Set the properties to be 2 columns by 3 rows. Move the cursor over to the drawing table and click/hold/drag/release the cursor from the upper left side of the block area to the lower right side of the block area. Add to
Design and Sew Along 3 – Lesson Two
Posted 09-13-2020 by Yvonne | Posted in: Design and Sew Along EQ8 Lessons with Yvonne Favorite Posts Lesson 2
Welcome to Design and Sew Along 3–Lesson Two. I hope you liked the blocks we created in lesson one. We will continue to create more 16 inch blocks to help us celebrate the seasons and the holidays that fall into the season. We will continue with late Fall designs into the early Winter designs in lesson two. I strongly suggest you watch the video first, at the bottom of this blog page to understand what steps we will be taking to create our lesson blocks. OPEN EXISTING PROJECT FILE AND CLEAN UP THE SKETCHBOOK 1. Click onto the EQ8 icon on your desktop to launch the program. 2. On the opening screen, click on the ‘open an existing project’ in the center of the screen. 3. On the screen, click on the Design and Sew Along 3 project name to select it and then click on the OK at the
Design and Sew Along 3 – Lesson One
Posted 09-06-2020 by Yvonne | Posted in: Design and Sew Along EQ8 Lessons with Yvonne Favorite Posts Lesson 1
Welcome to DESIGN AND SEW ALONG 3-LESSONS WITH YVONNE. This is lesson one (1) in this series that will focus on seasons and holidays in each of those seasons utilizing the EQ8 software. Not everyone celebrates holidays, so you will have the option of creating a seasonal block instead of a holiday block. Not all countries celebrate the holidays at the same time. For instance, Thanksgiving in Canada is in October, and in the USA it is celebrated in November. You will design your blocks in plenty of time to be able to stitch them out before your holiday time. We will be making blocks that are all the same size so you will be able to put them together to make one large quilt or use them as blocks for smaller projects like bags, table runners, wall hangings, and quick gifts for others. The written lessons will appear each
Design & Discover – Strip Quilts!
Posted 09-01-2020 by Heidi | Posted in: Design & Discover
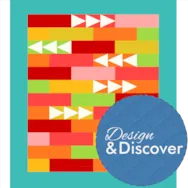
Strip quilts layouts are so versatile! You can use them for the typical strip quilt layouts, but so much more! Click Quilt Worktable Click NEW QUILT Click Horizontal Strip Click LAYOUT tab Under Select a Strip Style choose: Pieced Blocks Set the Width to: 3 Set the Length to : 30 Under the NUMBER OF BLOCKS Set Along length to: 3 Click on the second strip. Under Select a Strip Style choose Half Drop Blocks Set the Width to: 3 Set the Length to : 30 Under the NUMBER OF BLOCKS set Along length to: 3 Click on the third and click the Delete button. Also delete the 4th and 5th rows. Click on the first row. Check the Clone the selected strip box. Click Add. Click on the second row. Check Clone the selected strip. Click Add. Repeat alternating cloning every other row until you have 12 rows. Click the DESIGN tab Click
Design and Sew Along 3 – New Series Introduction
Posted 08-30-2020 by Yvonne | Posted in: Design and Sew Along EQ8 Lessons with Yvonne Favorite Posts
Welcome to the newest series DESIGN AND SEW ALONG 3- LESSONS WITH YVONNE. These classes are designed for the EQ8 program. In this series, we will be looking at the changing seasons and specifically exploring the holidays/events that occur during that season. Not every single holiday will be addressed; most will be holidays that are celebrated in North America and not necessarily worldwide. We will be constructing blocks using different drawing methods and using the built-in blocks in EQ8 to create our unique blocks that express the seasons/holidays throughout the year. Each lesson will have blocks being made of the same size so at the end of the DESIGN AND SEW ALONG 3–LESSONS WITH YVONNE you will be able to add all the blocks together to create an overall seasonal/holiday quilt. Or, you can use the blocks each month to create placemats, table runners, fabric books, shopping bags, etc. to celebrate
Design & Discover – Image Worktable
Posted 08-01-2020 by Heidi | Posted in: Design & Discover
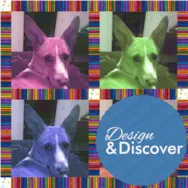
This month will be an overview of the Image Worktable and we’ll be making quilts with some images we create. Let’s get started! Open EQ8. Click Image Worktable. Click Import Image and navigate to wherever your image is saved on your computer. Click Open. Crop the image if needed. Click Add to Project Sketchbook . If you haven’t named your project yet, EQ8 will prompt you to do so. (To be saved, your item needs to be in the Sketchbook AND your project needs to be named. Here is more information.) Click Color on the green ribbon. Read about all the Color Tools and have fun experimenting. Create Colorway was used to create the different colored dog. Click Add to Project Sketchbook to save any variations. Click Histogram on the green ribbon. Read about all the Histogram options. You can start with your original image or one of the variations. These tools are more


