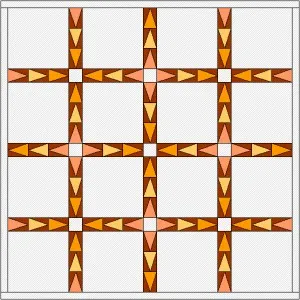
To set a pieced block into a sash space.
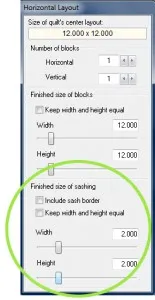
- Click the Layout tab at the bottom of your screen and add Sashing.

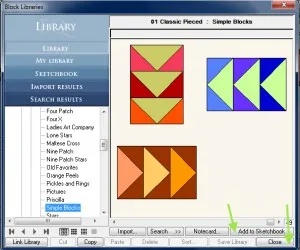
- Click Libraries > Block Library. Find the blocks you want. Click Add to Sketchbook and Close.

- On Layer 1, click the Set Blocks
 tool.
tool. - CTRL+click on a sash space. This will set your pieced block into half the sash spaces. Repeat to fill the other sash spaces.
- Click the Rotate Block
 tool.
tool. - Use CTRL+click to rotate alternate sash blocks needing rotating.

Tips for finding a block that works well as a pieced sash
- Look at LIBRARIES > Block Library > Sash Blocks
These square blocks look good in sash spaces. But they look odd in the Library because they were drawn as rectangles, to fit sash spaces. Therefore they look “squished” when displayed in squares. - Look at LIBRARIES > Block Library > Border Blocks
Many of these blocks also work well set into rectangles. Look for blocks with horizontal designs. These “stretch” well. - Draw your own
To draw your own sash block, change the drawing board from square to the size of your rectangular sash.
Drawing a sash block
- Click the Layout tab. Look at the size of your sash strips.
Length = length of your block
Width = width of your sash
For example, if your block is 10″ long and your sash is 2″ wide, you’ll draw blocks 10” x 2”. - Click WORKTABLE > Work on Block.
- Click BLOCK > New Block > EasyDraw Block.
- Click VIEW. If Precision Bar is not checked, click it.
- Enter the following on the Precision Bar:
Block Width: 10.00
Block Height: 2.00
Snaps Horizontal: 40 (block length x 4 = Snaps Horizontal number)
Snaps Vertical: 24
Snaps are important when Snap to Grid is enabled. The snap points are where lines can start and stop as you draw. Setting the horizontal Snap points to 40 on a 10″ block gives you a grid point every 1/4″. If the length of your block is not divisible by the number of Snap points you set, you will notice that lines will “jump” or “snap” to the wrong places.

- Click OK. Now that your block is the same size as your sash, you can draw your sash block, seeing exactly how it will look.
We are here to help! If you have questions about this, or anything else please contact tech support.


03-22-2017
11:24 am
Cool Idea! I’m saving it. Ann
03-31-2017
12:34 am
Tried to pin this on my EQ6/7 board but couldn’t get an image.
03-31-2017
8:29 am
Someone wanted to pin this on their board for EQ6/7 but said they couldn’t get an image. Try putting your mouse on the title and then pinning.