Reverse engineer, un-sew, do over, all are terms to work backwards. You can start with a pre-made block and then determine your embroidery to enhance the block. Often, you create the embroidery design first and make it into a quilt block, but in this case we can work backwards. Remember, there is always more than one way to create a design and you can determine which way works best for you.
I started with a pieced block that I know the finished size is 6 inches. Therefore, I create an embroidery design on a 6 inch hoop layout size so I can see the exact placement of the embroidery design.

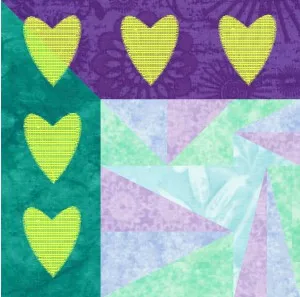
My block has a 4 inch corner block with an asymmetrical border of 2 inches on each side. From here I know the measurements I need to work with for my embroidery to fit the block exactly.
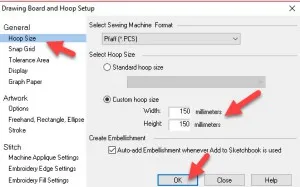
Open the stitch worktable ![]() and set the drawing board options
and set the drawing board options![]() to be a 6 inch hoop size (150 x 150 mm). Remember, this is not necessarily my hoop size, but rather the stitch field size I need to match the block I am working with.
to be a 6 inch hoop size (150 x 150 mm). Remember, this is not necessarily my hoop size, but rather the stitch field size I need to match the block I am working with.
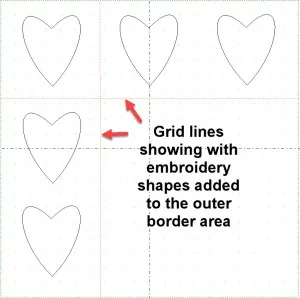
On the artwork tab of the embroidery work table, I can now design my embroidered elements to fit precisely into the 2 inch borders of my block design. You can use the line drawing tool ![]() to draw two lines horizontal and vertical to help define where the 2 inch border is on the block. Set the drawing lines to guides by clicking on STITCHING>Convert to Guides.
to draw two lines horizontal and vertical to help define where the 2 inch border is on the block. Set the drawing lines to guides by clicking on STITCHING>Convert to Guides.

Once the guidelines are present, create any design you want to embroider so it fits perfectly into the border areas of the block. The guidelines act as both a visual sectioning, and as a reminder there is a seam in the block at this point where you would not want your embroidery to cross over the seam line because it may create a bump in the embroidery design.
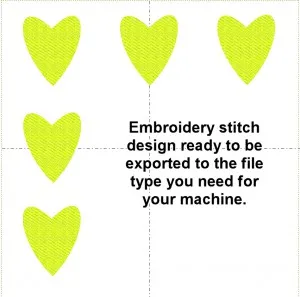
Click on the stitch tab and add the design to the sketchbook.![]()
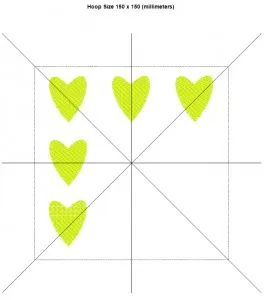
Print a template with the hoop centering markings to use for perfect placement at the machine.
Click on the printer icon and then click on the words ‘stitching design’.
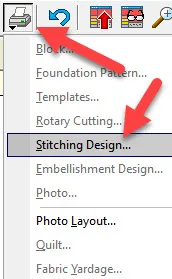
In the stitching dialogue box, click on the ‘print alignment, print hoop outline, and print hoop size’ options.
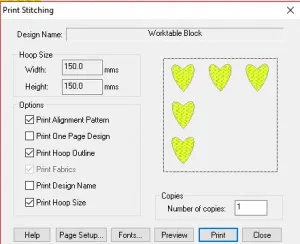
I print my templates on clear plastic overhead projector film so I can see through it when hooping for perfect alignment.
When hooping your premade block, you will use your template to assure perfect alignment of the embroidery design onto the block background.
Register now on the EQ website for the EQAcademy retreat in April 2017 and work along with me for 3 days exploring the abilities of the EQStitch program. Hope to see you there!


12-19-2016
7:19 pm
You make it look so easy.
12-19-2016
7:48 pm
Jeannie it is easy! EQStitch is an entry level auto digitizing program that integrates beautifully with EQ7. Anyone can use it regardless of your skill level.