You can take the simplest of designs and create a different look by using texture.
Open the EQStitch program.
Click on the stitch worktable icon ![]() at the top of the screen.
at the top of the screen.
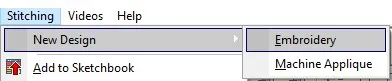
Click on STITCHING>New Design>Embroidery
Click on the drawing board options icon![]() on the properties bar.
on the properties bar.
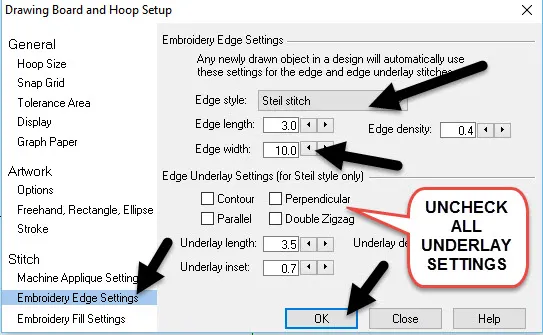
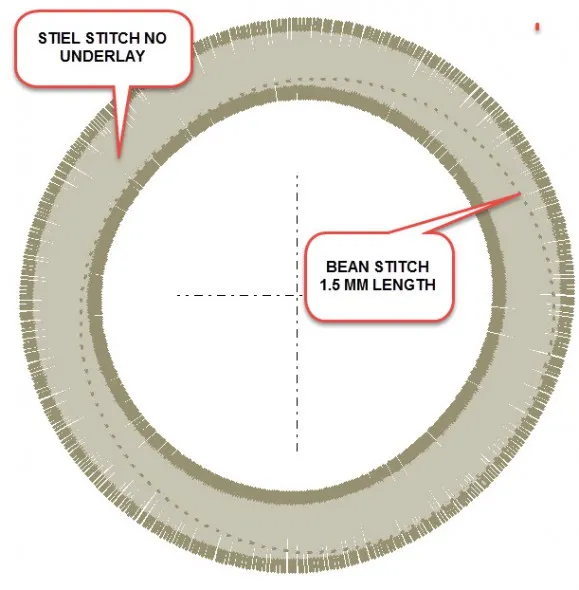
In the drawing options box, click on the embroidery edge settings and set the edge to a steil stitch with the maximum width of 10 mm and no underlay stitches. Click OK in the bottom of the box.
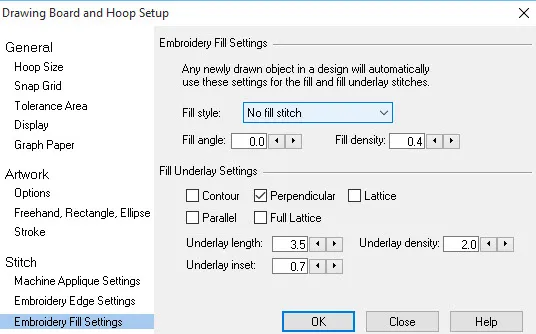
Click on the drawing board icon ![]() again and set the embroidery fill settings to no fill stitches and click on the OK in the bottom of the box.
again and set the embroidery fill settings to no fill stitches and click on the OK in the bottom of the box.
Click/hold the oval tool ![]() to get the fly out menu. Select the circle from the menu.
to get the fly out menu. Select the circle from the menu.
![]()
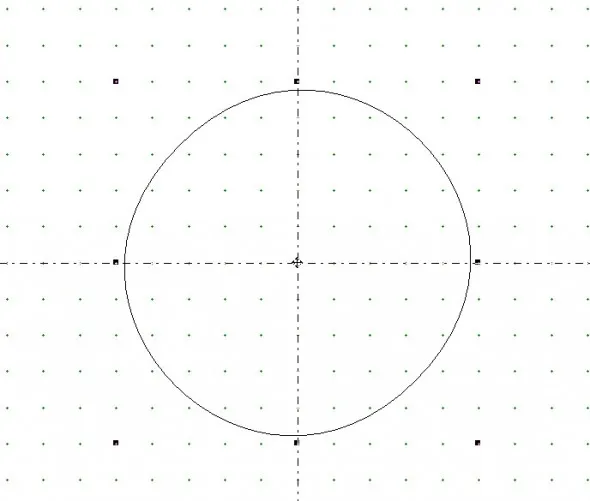
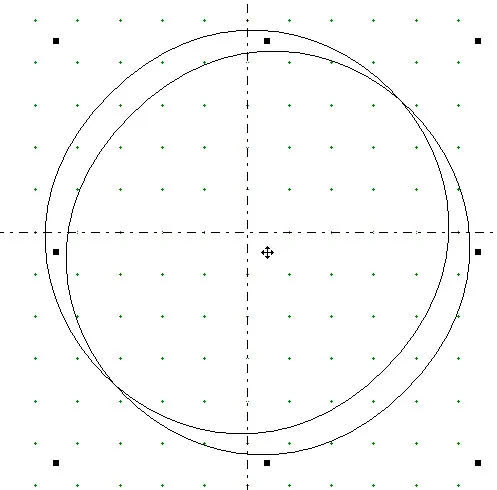
Move the cursor over to the hoop area and while holding down the control key on the keyboard, click/hold/drag/release a perfect circle in the center of the page.
While the shape is still selected, click on the clone selected objects icon ![]() on the properties bar at the top of the screen to place a second circle on the hoop area.
on the properties bar at the top of the screen to place a second circle on the hoop area.
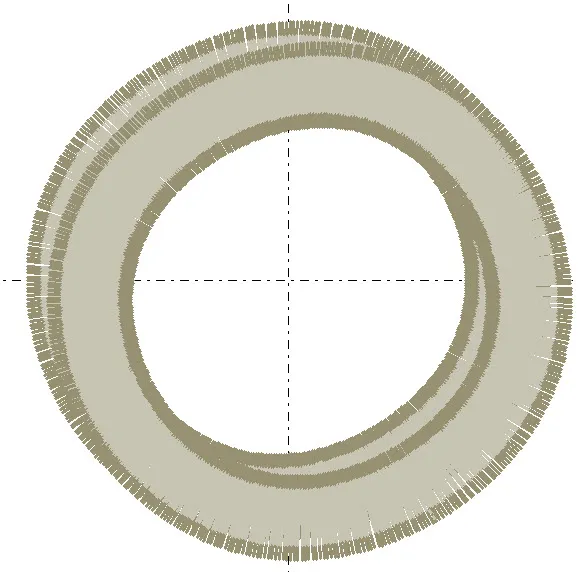
Click on the stitch tab at the bottom of the screen. The stitch properties you set on the drawing board are automatically applied to the shapes.
Click on the set edge stitch tool ![]() on the toolbar.
on the toolbar.
Type the edge properties on the properties bar to be a bean stitch with a 1.5 mm stitch length.

Move the cursor over to the cloned copy of the circle and click once to set the new stitch property.
Click on the set tread icon ![]() on the toolbar and choose any color you want to color each of the thread edges.
on the toolbar and choose any color you want to color each of the thread edges.

Click on the artwork tab at the bottom of the screen.
Click on the pick tool ![]() to select it. Click on each of the two circles and click on the center selected objects icon
to select it. Click on each of the two circles and click on the center selected objects icon ![]() on the properties bar to lay the two circles one directly on top of the other in the center of the hoop.
on the properties bar to lay the two circles one directly on top of the other in the center of the hoop.
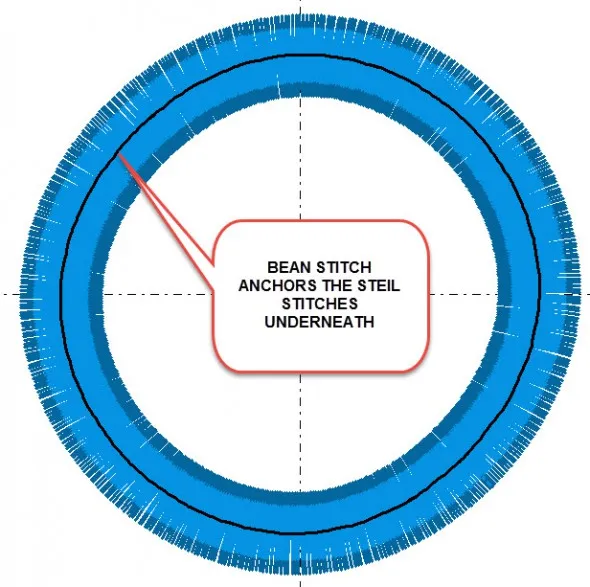
Click on the stitch tab to view the design as stitches. The cloned bean stitch will fall directly in the center of the steil stitches and act as an anchor for the stitches.
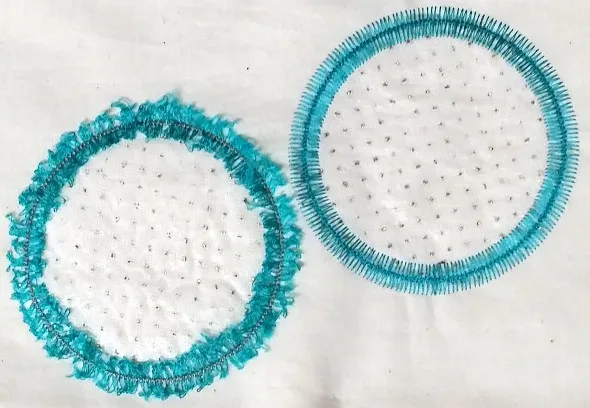
AT THE MACHINE–After stitching the design, clip the bobbin thread from the back and release the top steil stitches to create a finge effect.
Join me for EQAcademy Denver in September 2016.


05-22-2016
5:01 pm
Your ideas are so fascinating, Yvonne. I can hardly wait to try today’s lesson.