I have the pleasure of teaching a machine embroidery club every month in my home town. Each month I come up with digitized designs and a corresponding lesson about the design for the students. They then take the stitch files and create whatever project they wish with the stitch outs. Show and tell is awesome and I love seeing what they have created with the designs I provided for them.
There is one thing that makes me cringe when I am watching the students stitch or when they are showing something they have done that was either a free internet design or a purchased design from a website and they say ‘This design is awful and very poorly digitized!’ But is it always the fault of digitizing or is it some other influencing factor?
The digitizing is only the first step to creating an embroidery design. Hopefully, the digitizer will always test sew their design before releasing it to the public to make sure it is indeed designed properly. Things I look for in a quality design are things like enough underlay stitches for good support of the top embroidery stitches, color sorting to have fewer thread changes at the machine, and good pathing techniques to avoid all those jump stitches. When you test sew your design, you can see if you need to go back and adjust your design a bit. Sometimes it looks great on the computer screen, but isn’t always great at the machine.
There are numerous other factors that can influence how well a design looks after stitching. Below is a list of items to consider when stitching an embroidery design.
1. How clean is your machine? Lint in the upper thread guide or built up in the lower tension area can cause lots of issues. Skipped stitches, broken thread, and a loss of thread balance from upper to lower thread can cause a real disappointment in an embroidery design. Before you begin a project, clean all the thread path areas carefully to remove the offensive lint.
2. Check your needle for correct size and type. There is a reason there are so many different types of needles on the market. No one needle is good for every project. You need to think about the thread type you are using and the type of fabric you are stitching onto when selecting your needle. Also, the needle eye type will vary depending on the thread you choose. Make sure you are using the correct needle to stitch your design flawlessly.
3. Know your machine settings. You can adjust the speed that the machine stitches. It may be necessary to slow the machine down when using specialty threads which could create more drag when going through the needle eye. Depending on your machine, you can set the trim thread options to trim a shorter jump stitch length. You may be able to color sort at the machine or even set the machine to stitch all color stops the same color so it keeps stitching. If you are trying to align patterns, some machines have a camera in them so you can see exactly where the embroidery design will stitch inside the stitch field.
4. Choose the correct hoop size. Always choose the smallest possible hoop you own that will accommodate the size of the embroidery design. You will use less stabilizer by choosing a smaller hoop and the design will be stabilized better in a smaller hoop than a larger hoop. The fabric gets pushed and pulled by the stitches being laid down and the smaller hoop area helps to reduce this problem.
5. Choose the correct stabilizer products. There are many stabilizers on the market and they all work differently. There is no one stabilizer that works for all fabric types. I always have at least three types on hand–wash away, tear away, and fusible. There are many more, but I find I use the tear away the most for the type of stitching I do. Evaluate what your design is and what fabric you are stitching it onto and choose the stabilizer that works best. NOTE: Sometimes you need stabilizer on both the top and bottom of the fabric and they can both be different from each other. Research stabilizers and when they are used to understand all the choices you have. Using the wrong stabilizer can really affect the look of your embroidery design.
6. Use proper hooping techniques. So many times I see students trying to save on stabilizer and using it to only stabilize the exact size of the area they are stitching. This is not a good practice. Your fabric selection and your stabilizer should be at least one inch larger than your hoop size on all sides. This allows the hoop to grab both layers and hold them firmly in all directions for maximum stabilization. Without this proper hooping your design may shift slightly and distort in the hoop creating a poor result.
7. Use adhesion techniques for maximum fabric stability. This can be accomplished with a spray adhesive or with a sticky backed stabilizer. This insures that the fabric is firmly held in place against your stabilizer. Floating the two layers without adhesion will cause slippage. Use the spray adhesive sparingly and use a good quality adhesive. Some adhesives are toxic and can gum up your needle badly causing poor stitch quality.
8. Choose the correct design for the fabric. Stitching a linear design like red work looks good on a nice quilting cotton fabric but would be totally lost in a deep plush toweling material. Also, a dense design that requires fairly firm stabilizer to stitch properly would ruin the drape of a slinky material used for clothing. Consider what your design is and what you want to place it on for the best results.
9. How are you going to handle the project after it is stitched? Is this going to be stitched on card stock for a gift card, or be a wall hanging that is never touched or laundered, or is it going to be clothing that will have high wear and need laundering. Depending on the project, you may want to reconsider the embroidery design you are selecting or want to digitize a design that is better suited to the end use of the project. Your thread choice will influence the project also. Some threads run when laundered so choose carefully when stitching the design.
10. Thread tension issues are due to many factors. Make sure your thread path is clear of any obstructions. If it gets caught on something while stitching it will cause thread and needle breakage. Know when a thread needs to unwind from the side of the spool or over the top of the spool for smooth release. Often we use a finer thread in the bobbin to reduce bulk when stitching embroidery designs. You may need to adjust your bobbin tension to accommodate the thread type you are using in the bobbin. Tension settings for the upper thread can be set easily enough at the machine, but try using a thread net on your spool first before adjusting the upper thread tension.
11. When you are creating designs to sell or share with others, you want to keep in mind the standard for embroidery designs. Most designs are digitized for a 50 wt. embroidery thread with a thinner thread in the bobbin. They are designed to stitch on stabilized medium weight cotton materials. If your design is meant to be used in a way different than the standard use, be sure to let your customers know or they will have disappointing results with your digitizing. The same goes for when you stitch something you did not create yourself. Make sure you know how the design was meant to be stitched for best results.
These are just a few of the things that can change the quality of the design we have digitized. Understand each of these influences and make adjustments when necessary. Happy Stitching!


08-24-2015
11:18 am
This looks really neat, the different colors make it fun. Would love to learn
how to learn to do this.
08-24-2015
11:47 am
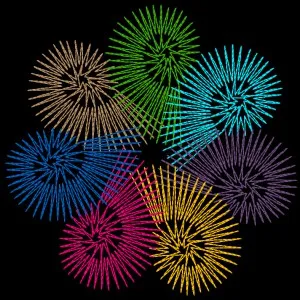
Thanks Karla. This design is actually one of the designs that can be purchased through the Electric Quilt Company as an add-on project file for the EQStitch program. It is part of the String Art series of designs.
09-01-2015
8:14 am
Thank you for the wonderful information. You broke it down into bite size chunks so I am not overwhelmed. I especially liked the tip about considering the end use of the project, that is a good one!
09-01-2015
8:52 pm
Right Carol! How something will be used/abused always dictates the type of stitches I select to design with.