Exporting in EQ7
You can use any design in EQ7 that you draw, or get from the 5000+ Block Library in EQ7 as a quilting design. Setting that design on your quilt on Layer 3 creates an EQ quilting stencil. And you can export your stencil images in any of these generic file formats: .jpeg, .gif, .tiff, .png or .bmp. Depending on what files your machine accepts, this may allow you to import the design into your digitization software for quilting.
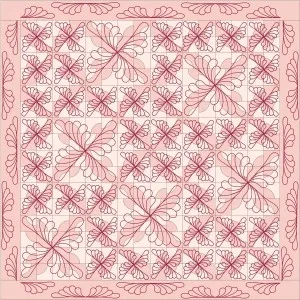
Exporting in EQ7 is super easy. Let’s learn how. For this mini-lesson, we’ve used a more simplistic Quilting Design on a Drunkards Path quilt (as seen in Machine Quilting Unlimited, January/February issue).
Step 1: With your quilt displayed on the Quilt Worktable, click on Layer 3.
Step 2: On the right-hand toolbar, make sure the Set Thread ![]() tool is on your toolbar.
tool is on your toolbar.
(If it is not, right-click the toolbar > choose Add/Remove Buttons ![]() > click the Set Thread toolto add it.)
> click the Set Thread toolto add it.)
Step 3: Click and hold on the Set Thread tool. You’ll see three tools pop out. Click the Spray Thread tool, ![]() then put checks in all three boxes (selecting the top one for style and weight), and click on a dark or black thread color in the palette.
then put checks in all three boxes (selecting the top one for style and weight), and click on a dark or black thread color in the palette.
Step 4: Click on the stencil on your quilt on Layer 3, to give the stencil a thin, solid line that will export well.
Step 5: Click the Select tool ![]() , then click on the quilting design on your quilt – the design with the solid line that you want to export.
, then click on the quilting design on your quilt – the design with the solid line that you want to export.
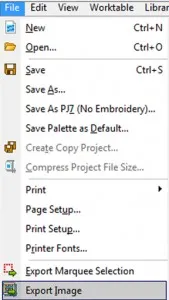
Step 6: Click File > Export Image.
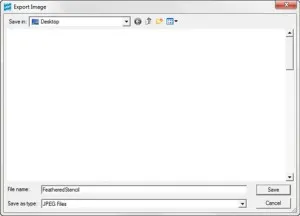
Step 7: Choose a location for saving your file and give it a name.
Step 8: Click the down arrow next to Save as type: and choose the desired file type.
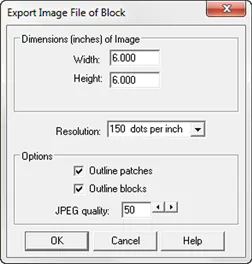
Step 10: In the Export Image File of Block dialog box, choose width and height you need for your image. Insert ExportImageBlockofFile.jpg – this is for steps 10-13
Step 11: Choose a resolution for your image. 150 dpi is fine for use with digitization software.
Step 12: Check both Outline Patches and Outline blocks.
Step 13: Click OK. You have successfully exported an image. Depending on what files your digitization software can use, you may be able to import this and stitch it.
There are many different machines for digitizing out there so be sure to follow the instructions for your machine when importing your EQ7 stencil image.
Learn more about Exporting Images in EQ7
To learn more about exporting images from EQ7, go to: http://www.electricquilt.com/Retailers/EQRA/imgs/ExportingLesson.pdf In this lesson you will learn how to export images of your quilt for your website, publications, for creating instructions and more.
