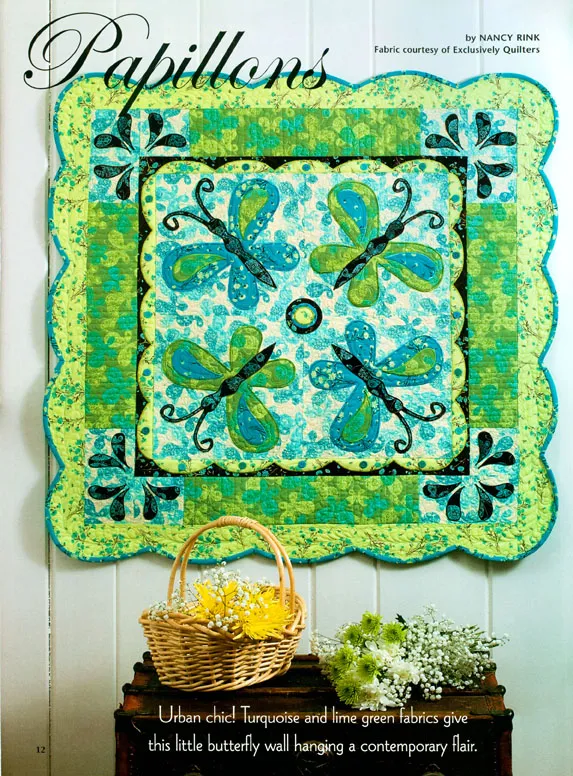
 Nancy Rink is an EQ6 quilt designer who was recently featured in the July issue of The Quilter Magazine. The large appliqué butterflies nearly jump off the quilt! I wanted to know how she designed the quilt and how she drew the butterflies so I asked her to tell me a bit more about the quilt design. She had some great EQ design tips that needed to be shared. Here’s what she writes:
See more on how to make a perfect half circle for scalloped borders in a previous blog entry from Andrea.
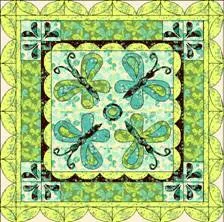 Although Nancy wasn’t aware of the available irregular borders before this project, I have got to hand it to her, she created a great work around to design and plan for the quilt to have scalloped edge. I want to share it with you as inspiration;
“For this specific quilt Nancy chose to use a “Not too long ago I bought this nifty little adjustable scallop template made by Wrights, and it has inspired me to start incorporating a lot of scallops into my quilts. I’m normally not much of a gadget person, but when I find something that really tickles my fancy I use it to death. Once I figured out how to use the template, I began to think about how to transfer the scallop to EQ6. I’ve come up with a couple of relatively easy methods. The first is to draw a block with a scallop. (see image) This is relatively easy and once you have your scallop block, you can copy it from project to project. For outer border, to achieve the scallop look so you can visually inspect how it might look on your quilt, it’s easiest to simply use the Double Orange Peel block (sides) and Orange Peel (corner) blocks. Color only part of the block, then toggle off “Outline Patches” and “Outline Blocks”. Here’s a picture of how my quilt looks in EQ6 with the lines toggled on.”
Nancy could have drawn her own motif and saved it to her sketchbook for an original border. The voided space will not be calculated into your printed template or fabric yardage. If you don’t know how to do something in EQ6 I urge you to check your manual or companion books, call tech support, or just experiment like Nancy did!
Visit Nancy’s website at NancyRinkDesigns.com
